
























Professional or DIY jewelry display: which should you choose?
Professional or homemade jewelry display: what you need to know

It's a question almost every jewelry designer asks: should you make your own displays (DIY) or invest in professional supports? One promises savings and a personal touch, the other quality, consistency, and brand image.
In this article, we honestly break down the advantages and limitations of each option, calculate the real cost of homemade, and help you choose between a professional or homemade jewelry display according to your situation.
Homemade display: strengths and limitations


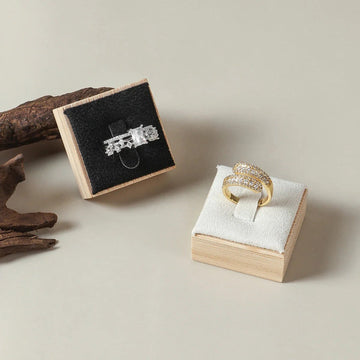
DIY is booming, especially among beginner designers. Collecting driftwood, transforming a branch, covering a board with fabric: the possibilities are endless.
The real advantages
- Very low initial material cost
- Total customization, consistent with your universe
- Visual uniqueness, sometimes stunning at a craft market
- Creative pleasure and eco-responsible approach
- Possibility to prototype, test, iterate freely
The real limitations
- Often insufficient strength for intensive use
- Amateur finishes visible to the customer's trained eye
- No ergonomics designed for jewelry
- Difficult to reproduce identically
- Often rapid aging
- Sometimes penalized brand image
Professional display: strengths and limitations

The real advantages
- Immediately credible and professional brand image
- Superior durability (5 to 10 years)
- Specific ergonomics to highlight jewelry
- Visual consistency from one stand to another
- Valuable time savings
- Reproducibility: order 5 identical supports in two clicks
The real limitations
- Higher initial investment
- Standardization: less raw uniqueness
- Choice that can seem restrictive
Discover the professional displays that change a shop window
Our collection of professional jewelry displays.
View the collectionThe real cost of homemade

It's the classic DIY trap: we keep the material cost, we forget everything else. Here is the honest calculation for 5 DIY supports:
| Item | Cost |
|---|---|
| Raw materials | 40 to 80 € |
| Specific tools | 30 to 60 € |
| Design time | 3 to 5 h |
| Manufacturing time | 5 to 10 h |
| Mistakes and rework (20 %) | 1 to 2 h |
| Estimated lifespan | 1 to 2 seasons |
10 hours at 25 €/h = 250 € of hidden cost. Add materials and tools: 320-390 € for 5 DIY supports that will last 1-2 seasons. Compare to 5 decent professional displays around 150-250 €, durable for 5 years and more.
The impact on your brand image
Your displays tell a story even before the customer touches your jewelry. A makeshift support can send a contradictory message with an 80 € piece of jewelry: the customer unconsciously thinks "if the case is not neat, is the jewelry really?".

Time: the most valuable resource
The time you spend making displays is time you are not spending creating new pieces, photographing, publishing, selling. Yet these are the actions that really advance your business.
Which choice according to your stage of activity?
Launch phase (0-6 months)
DIY is legitimate to validate your concept. Favor 2-3 neat DIY supports and 1-2 strategic professional displays.
Structuring phase (6 months - 2 years)
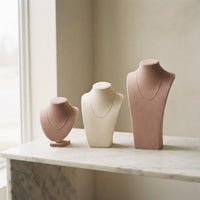
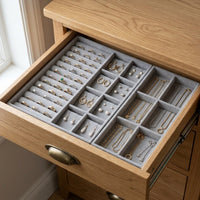
It's time to switch to professional staging. Invest in batches in consistent displays: necklace busts, jewelry trays.
Development phase (2 years and +)
100% professional, without hesitation. You need consistency across multiple events and reproducibility.
The hybrid solution: the best of both worlds
The majority of brilliant designers choose a base of neat and consistent professional displays, punctuated by a few signature DIY pieces. This combination reassures (pro) while telling your story (DIY).
Build a staging that inspires confidence
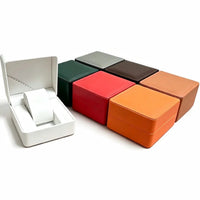
Browse our necklace busts, trays and jewelry boxes.
Discover all the displaysIf you try DIY: best practices
Choose worthy materials
Avoid low-end plywood and fluffy fabrics. Invest in solid wood, professional cut velvet or thick faux leather.
Work the finishes
Invisible seams, sharp corners, even gluing, sanded surfaces.

Stylistic consistency
All your supports must share at least 2 common codes (material, color, shape).
Test before the big day
Photograph your jewelry on your DIY displays. If the photo result is average, the real-life result will be too.
Final decision grid
| Criterion | Rather professional | Rather DIY |
|---|---|---|
| Jewelry over 50 € per piece | Yes | No |
| More than 5 markets or sales per year | Yes | No |
| Physical store or pop-up | Yes | No |
| Emerging activity (test) | Optional | Yes |
| Budget < 100 € | Limited | Yes |
| High-end brand image | Yes | No |
| Very unique signature universe | Mix | Yes |
| Lack of time | Yes | No |

Homemade jewelry display: what ideas and what materials?
If you choose to make your own supports, start with a simple idea and materials that are easy to work with. A successful homemade jewelry display relies on a sober shape, a clean surface and unshakable stability.
The simplest ideas to make
- A sanded branch or driftwood, fixed on a weighted base, for necklaces and bracelets.
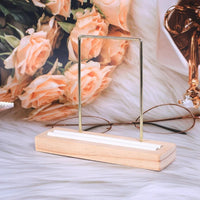
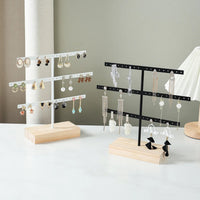
- A frame filled with fine mesh or stretched fabric, for earrings.
- A light board covered with fabric, with a few slits or ribbons, for rings.
- A rigid cardboard cone or cylinder covered with fabric, for a pendant or a ring.
- A low wooden tray lined with felt, to group several pieces.
Each of these ideas requires few tools. It requires regularity: five supports of the same model are better than five different shapes.
| Idea | Suitable jewelry | Difficulty |
|---|---|---|
| Branch or driftwood | Necklaces, bracelets | Easy |
| Mesh frame | Earrings | Medium |
| Fabric board | Rings | Medium |
| Covered cone | Pendants, rings | Medium |
| Felt tray | All types | Easy |
Materials that last
A material is judged by repeated use, not on the first day. Ask yourself about its aging: a support that yellows, deforms or loses its tint in a few seasons ruins the initial effect.
Solid wood, sanded then oiled or varnished, resists better than plywood. On the fabric side, velvet, thick linen and felt stretch neatly and support handling.

- A weighted base, so that the support does not tip over when a piece of jewelry is unhooked.
- Rounded corners and sanded edges, so as not to catch the chains.
- Glue adapted to fabric, applied evenly, without excess thickness.
Covering a support with fabric, step by step
Fabric covering is the most common DIY action. It requires patience more than equipment, and each step is checked by eye.
- Cut the fabric with a margin of a few centimeters all around the support.
- Glue the center first, then stretch towards the edges without creating folds.
- Fold the edges to the back and fix them with small touches of glue.
- Take care of the corners: fold them in an envelope to obtain a sharp edge.
- Let dry flat, then check the surface with grazing light.
Beginner mistakes to avoid
They are repeated from one workshop to another and are easily corrected when known:
- Multiplying shapes: the stand loses its consistency as soon as each support has its own style.
- Choosing a fabric that frays: the edges come apart in a few weeks.
- Forgetting the weight of the jewelry: a heavy necklace makes a branch that is too thin tilt.
- Taking a color that competes with the jewelry: a neutral background highlights the piece.
Market, fair or shop: the place of sale changes the choice
The same display stand doesn't work the same way at a market stall as it does in a shop window. Before making or buying one, consider the location: it determines the requirements for weight, assembly, and durability.
What you need at a market or trade show
You set up and take down the stand several times a year. Your displays travel, rub against each other in boxes, and are exposed to changing daylight.
- Lightweight pieces that fit together in a single box.
- Quick, tool-free assembly that can be done identically every time.
- A surface that is easy to wipe down after a day of handling.
What you need in a shop or shop window
Here, the displays stay in place for months. Durability, colorfastness, and ease of cleaning matter more than weight. Visual consistency also builds customer confidence.
Lighting and the tabletop background
At a market, you don't control the lighting. A neutral background, a plain tablecloth, and a matte display minimize reflections and let the jewelry shine on its own.
Display height: a simple guideline
Regardless of the location, tier your display: the star piece at the top, related pieces in the middle, and accent pieces flat. Place the main piece at the customer's eye level and leave space around it.
Homemade or professional: the questions to ask yourself before deciding
The decision grid above provides the framework. Here are four simple questions to help you decide what's right for your situation, without any sugarcoating.
How many times will you reuse this display?
A display used two or three times can remain homemade. If it's used at every market for years, durability becomes the number one criterion, and professional displays have the edge.
What is the value of your jewelry?
The more valuable the piece, the more flawless the presentation must be. A homemade display can make the customer doubt the quality of the jewelry itself.

Also think ahead: a display that sells well can be repurchased or complemented, while an impossible-to-find model forces you to start over. Note the color, dimensions, and material of every successful piece.
How much time can you devote to it?
The cost table showed it: the time spent designing, making, and reworking takes a toll. Every hour spent sanding a display is one less hour to create, photograph, or sell.
Do you need several identical displays?
Replicating a handmade display exactly is difficult. If your stand requires a uniform series, a professional model that can be reordered with a few clicks solves the problem.
What image do you want to project for your brand?
A very raw, bohemian, or artisanal brand can easily incorporate handmade items. A high-end brand, on the other hand, requires factory-finished products without the slightest imperfection.
Testing a display before the big day
Whether homemade or professional, a display should be tested before it is exhibited. Three quick tests can prevent unpleasant surprises on the day of the event.
The photo test
Place your jewelry on the display near a window and photograph it. The photo shows what the customer will see: a distracting reflection, a background that overwhelms the piece, or a shape that hides the jewelry.
The stability test
Hang and unhook a piece ten times. The display must stay in place without slipping or tipping over, even with a long necklace.

The transport test
Pack your displays as you would for a market, then unpack them. A damaged corner, wrinkled fabric, or failing adhesive can be fixed in the workshop, not in front of customers.
The visual test
Step back two or three paces. If you can't spot the star piece within a second, the display is too cluttered or too subtle. Remove one element and try again.
- Place the jewelry and photograph it.
- Pack it, transport it, then unpack it.
- Hang and unhook it ten times.
- Step back and look for the star piece.
- Remove anything that distracts, then try again.
Our favorites for a polished stand
To build a cohesive foundation, browse our jewelry busts, jewelry trays, and selection of velvet displays. Here are four models that pair easily.
 360° Rotating Velvet Necklace Bust
 Black Velvet Necklace Bust Display
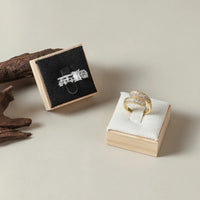
 Hexagonal Wood and Velvet Jewelry Tray
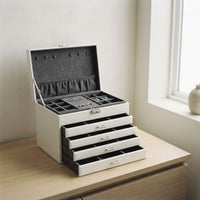
 Solid Wood Jewelry Tray with Drawer
Verdict: what we recommend
For 90% of working designers and jewelry makers, investing in professional displays pays off by the second season. It is better to start with five carefully chosen professional displays than 15 mismatched homemade ones.

FAQ
Can you start a jewelry business using only homemade items?
Yes, during the testing phase. But to make it sustainable, switching to professional displays will soon become necessary.
At what level of revenue should you switch to professional displays?
As soon as an event brings in €200 to €300 in profit, the investment in one or two professional displays will quickly pay off.
Can homemade items be perceived as "more authentic"?
Yes, in certain contexts (raw craftsmanship, bohemian), provided the homemade items are technically flawless.
How can you make a homemade jewelry display look professional?
Invest in high-quality materials, pay extreme attention to the finishing, and stick to two or three consistent visual elements.
How much does a homemade display really cost?
Factoring in materials, tools, and time valued at €25/h, a homemade display costs between €50 and €90, with quality inferior to a professional one.
Can you resell homemade displays?
Very rarely. Their resale value is almost zero. Professional displays can be resold for up to 50% of their original price.
Do you need a different display for each type of jewelry?
Ideally, yes: rings, necklaces, bracelets, and earrings each have their own specific ergonomics.
What material should you choose for a homemade jewelry display?
Sanded solid wood, felt, velvet, or thick linen work well and last. Avoid low-quality plywood and fabrics that are fuzzy or fray.
How can you prevent jewelry from slipping off a homemade display?
Choose a slightly textured fabric, add discreet slots or hooks, and weigh down the base. Always test by hanging and unhooking a piece several times.
Can you mix professional displays and homemade supports on the same stand?
Yes, this is actually the most common solution: a cohesive professional foundation with a few signature homemade pieces in the center. Share at least two common elements: material, color, or shape.
How many displays do you need for a small stand?
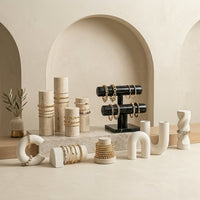
Five to eight carefully chosen pieces are enough for a market table: one or two tall pieces, a few intermediate levels, and one or two flat trays. An airy stand is better than a cluttered table.
Get our next articles
Tips, guides and new arrivals, straight to your inbox.