



























DIY earring holder: grid, tulle or pegboard
A homemade earring holder can be made with an old frame, a piece of mesh or tulle, and an evening. The result: visible, separated earrings that never get mismatched and can be grabbed in one motion in the morning.
This guide presents three designs (mesh frame, tulle frame, drilled board), the dimensions according to the type of earring, the finishes, and the mistakes to avoid. At the end, ready-made supports to compare.
Why make an earring holder yourself?
Earrings are the jewelry that gets lost the most: tiny, in pairs, easy to misplace. A dedicated holder solves the problem of mismatched pairs and junk drawers all at once.

What homemade brings
- Neatly arranged pairs: one row, one pair, everything is visible.
- A holder your size: as many rows as earrings.
- A recycled base: frame, wood scraps, fabric remnants.
- Decoration that serves: the earring holder becomes a little picture on the wall.
It is also an excellent weekend project, to share with a child or a friend: it is easy, it takes one evening, and it results in a useful and personal object.
For which earrings?
Each design has its strengths. The mesh welcomes drop earrings and hoops. The tulle holds studs and backings. The drilled board takes everything, provided you choose the right hole diameter.
How long to plan?
One hour for the mesh frame, thirty minutes for the tulle, one and a half hours for the drilled board. Allow a night for drying if you paint or varnish the frame.
Materials and dimensions of a homemade earring holder
The right holder depends on the shape of the earrings. This table shows the space to plan for each type, with the appropriate holder.
| Earring type | Space to plan | Suitable holder |
|---|---|---|
| Studs, backings | 2 cm between each pair | Tulle or small holes |
| Hoops | 3 to 4 cm wide each | Mesh or bar |
| Short drop earrings | Row of 6 cm high | Mesh or holes |
| Long drop earrings | Row of 8 to 10 cm high | Mesh, deep frame |
| Heavy earrings | Rigid holder, never tulle | Board or metal mesh |
These guidelines are common: measure your largest earrings before drawing the frame.

The basic materials
- A wooden frame of about 30 x 40 cm, glass and back removed.
- A flexible mesh with a mesh of about 1 cm, or rigid tulle.
- A glue gun or a stapler, and a pair of pliers.
- A board of about 1 cm thickness, a drill and a 2 mm drill bit for the drilled design.
- Some sandpaper, paint or wax for the finish.
Assess your collection before starting
Count your pairs by category: studs, hoops, short drop earrings, long drop earrings. This list determines the number of rows, the height of the frame and the choice of design. Many people discover that they own far more studs than drop earrings.
Choosing the frame
A straight wooden frame, without warping, of at least 2 cm deep, makes the best holder. A deeper frame gives drop earrings room to swing without hitting the wall.
Design 1: a mesh frame for drop earrings and hoops
This is the most versatile design. The mesh stretched in the frame offers a multitude of hanging points, and the earrings hang in front, clearly visible.
The steps of the mesh frame
- Disassemble the frame: remove the glass and back, keep only the wood.
- Sand and paint the frame, let it dry overnight.
- Cut the mesh slightly larger than the opening, with a pair of pliers.
- Fix it to the back of the frame with staples or hot glue, well stretched.
- Fold the edges of the mesh, then close with a thin cardboard back if you want to hide the back.
- Fix the frame to the wall with two rings and wire, or place it on a dresser.

A ready-to-place frame for inspiration
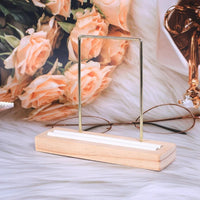
To see how a frame is filled, look at this wooden earring display frame: wooden frames filled with earrings and rings, on a dressing table.

How to hang the earrings?
Slide the earring hook into a mesh, from the front to the back, then pull it back up. One pair per column, with a free mesh between two pairs: the drop earrings do not touch each other or get tangled.
Design 2: a tulle frame for studs and backings
The stretched tulle holds the small stem earrings: you pierce the stud, place the backing behind. Each pair remains exactly where you left it.
The steps of the tulle frame
- Disassemble the frame and sand it like for the previous design.
- Cut a rigid tulle slightly larger than the opening.
- Stretch it over the frame, without distorting it, and staple it to the back every 4 cm.
- Cut the excess, glue a tape over the staples to hide them.
- Test with a pair of studs before hanging everything.

Where to find the tulle and the frame?
A piece of leftover lace, a remnant from a haberdashery or an old rigid mosquito net will do. The frame can be found at a flea market or in an attic: choose one that is rather deep, it protects the earrings better when you hang it.
What tulle density to choose?
A fine and rigid tulle, like veil tulle, holds the stems well. Tulle that is too loose will sag and drop the earrings. Double it in this case, or place it on a thin perforated cardboard back.
To place the tulle flat, work with two: one person holds the frame, the other stretches and staples alternating sides, like mounting a canvas. A tulle stretched evenly does not show creases.
The limits of tulle
It is suitable for light earrings: studs, small backings, fine hoops. For heavy drop earrings, it sags over time. Keep it for everyday pieces, and switch to the mesh or the board for the rest.
Design 3: a board with small holes
A wooden board with small holes holds the stems of studs and the hooks of drop earrings. It is the most durable design, which even supports fairly heavy earrings.
Unlike tulle or mesh, the drilled board never sags, which makes it the best choice for valuable earrings or slightly heavy pieces. Its only disadvantage: you need a little precision when drilling.
The steps of the drilled board
- Cut the board to 30 x 20 cm, about 1 cm thick, and sand it.
- Draw the grid: a point every 2 cm, a row every 5 cm.
- Drill with a 2 mm drill bit, on a wood scrap to avoid splinters on the back.
- Finish: fine sanding, oil or wax, complete drying.
- Secure the board in a frame or hang it by two rings.

How many holes to plan?
Count ten to fifteen pairs of studs for a 30 x 20 cm board, or six to eight pairs of drop earrings alternating rows. Always plan a few free holes: your collection will grow.
Why 2 mm?
The stem of an earring stud is very thin, and a hole that is too wide lets it slip. Two millimeters hold the stem without forcing it. Test first on a scrap to check that your earrings fit well.
Which DIY earring holder should you make?
The three designs are not suitable for the same earrings. This table helps you choose based on what you have.
| Criterion | Mesh frame | Tulle frame | Drilled board |
|---|---|---|---|
| For which earrings | Drop earrings, hoops | Studs, small earrings | All types |
| Difficulty | Easy | Very easy | Medium |
| Time | 1 hour | 30 minutes | 1 hr 30 |
| Durability | Good | Medium, the tulle stretches | Very good |
| Weight supported | Medium | Light | Higher |

If you are hesitating between two designs, start with the simplest one, the tulle. It is quick to make, uses very little material, and will show you what you really need before you start drilling.
A special case: clip-on earrings
Clip-on or pin earrings sit on the edge of a frame or board. A thin board with a well-sanded edge works very well: the clip slides on and holds effortlessly.
One design, or several?
Many people combine two: a mesh frame for drop earrings and a small tulle holder for studs. The wall remains tidy, and each type of earring has its own area.
Finishing and maintaining a DIY earring holder
A good finish prevents earrings from snagging and protects the holder. It only takes a few simple steps.
- Sand the frame and holes with 180-grit sandpaper, then 240-grit on the contact areas.
- Paint or oil in thin coats, and let dry completely.
- Round the ends of the mesh so they no longer snag anything.
- Air out for a few days before storing the earrings to let the paint smell dissipate.
Painting the frame: what color?
A light frame highlights dark earrings, while a dark frame makes gold and silver stand out. If you are hesitating, off-white or oiled natural wood will match almost any interior.
Protecting silver and delicate earrings
Silver tarnishes when exposed to air and certain products. Wipe your earrings before storing them, and avoid hanging them next to a holder that is still fresh with paint or varnish.
Placing the earring holder
Hang it at eye level, near a mirror or window. Avoid damp bathrooms and places in direct sunlight, which tarnish metal and warp wood.
Maintaining the holder
Dust the frame with a dry cloth once a month. If the tulle stretches, retighten it by adding a few staples. A drop of wax in the holes of the board will maintain the wood.
Errors to avoid with a DIY earring holder
A few flaws almost always occur with beginners. Avoiding them will save you an evening.
- Mesh or holes too tight: the pairs touch and get tangled.
- Tulle too loose: it stretches and lets the studs fall.
- Heavy earrings on tulle: it warps after a few weeks.
- Poorly sized holes: too wide, the posts slide out; too narrow, you have to force them.
- Unfolded mesh ends: they snag the earrings and prick fingers.

Also note that long-post or thick-hook earrings do not fit all fine holes. In this case, prefer the mesh, whose mesh is wider.
When DIY reaches its limits
A repurposed frame is suitable for a few dozen pairs. Beyond that, or for use in a shop, a holder designed for this is more stable, deeper, and easier to move.
Ready-made earring holders, to compare or take over
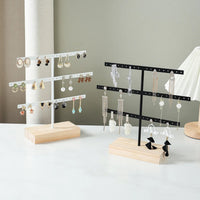
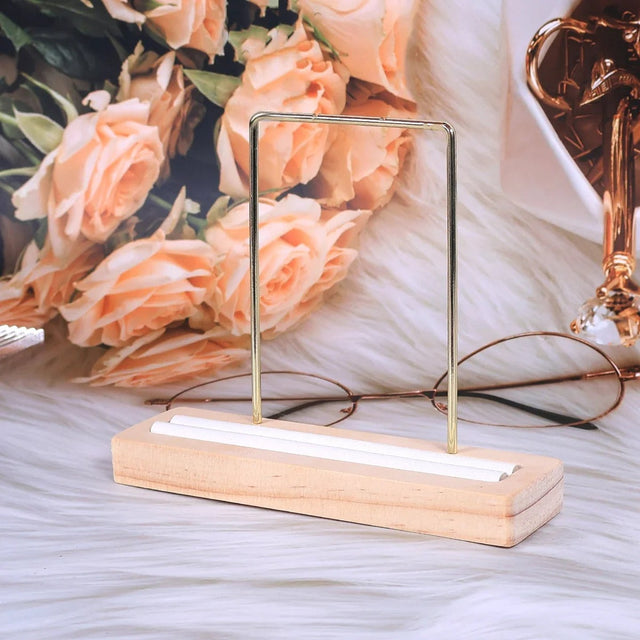
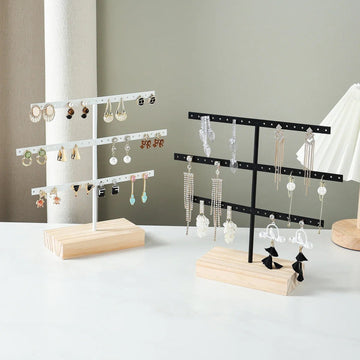
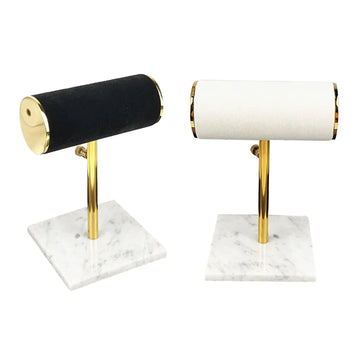
Here are four designs from the shop, to compare proportions or switch to a ready-made holder. Others are in the earring display collection.
Nordic Design Wood Earring Display Frame 3-Tier Metal Earring Display
 Tree Earring Display
 Wall Earring Display
To learn more, read our earring storage tip, and the other making ideas: the cardboard jewelry holder or the wooden jewelry holder. To hang your frame, also see our wall jewelry holder guide and the jewelry holder collection.
Frequently asked questions about the DIY earring holder
How to make a DIY earring holder?
Repurpose a wooden frame, remove the glass, then attach a flexible mesh or rigid tulle to the back. Sand and paint the frame, let it dry, then hang it on the wall or place it on a dresser.
How to make an earring frame?
Take a frame measuring about 30 x 40 cm, disassemble it, stretch a mesh with about 1 cm mesh size on the back and fix it with staples or hot glue. Fold the edges of the mesh well.
Which fabric to choose for a tulle earring holder?
A fine but rigid tulle, stretched without distorting it. A loose tulle will stretch over time. Double it or fix it on a thin perforated cardboard backing so it holds up better.
How far apart to place the holes or mesh?
One hole every 2 cm for studs, one mesh or column per pair for drop earrings, and one row every 5 cm approximately. For long drop earrings, allow 8 to 10 cm of height per row.
What hole diameter for piercing stud earrings?
About 2 mm. The post is very thin: a wider hole will let it slide. Test on a wood offcut before drilling the final board.
How to store heavy earrings?
On a rigid board or metal mesh, not on tulle. A solid hook, well-stretched mesh, or clean hole will hold the weight without warping the holder.
Your plan for a successful earring holder
For a neat result in one evening, follow this order.
| Step | Action |
|---|---|
| 1 | Sort your earrings by type: studs, hoops, drop earrings |
| 2 | Choose the design: mesh, tulle, or drilled board |
| 3 | Repurpose or buy a frame, mesh, tulle, or board |
| 4 | Sand, assemble, let dry |
| 5 | Test with one pair, then store all your earrings |
Keep your DIY frame for everyday use, and check out the earring display collection when your earring collection has grown.
Popular searches: DIY earring holder, handmade earring holder, DIY earring frame, handmade earring display, handmade earring holder, make a DIY earring holder, how to make an earring holder, handmade earring display, DIY earring holder, tulle earring holder.
Get our next articles
Tips, guides and new arrivals, straight to your inbox.